
Table of Contents
- Why Road Salt Damages Your Carpets More Than You Think
- Tools and Materials You Need Before You Start
- How to Remove Road Salt from Carpets: Step-by-Step
- Using a Vinegar and Water Solution for Salt Stains
- How to Remove Salt from Car Floor Mats Safely
- Best Carpet Cleaner for Salt Stains: What Actually Works
- Preventing Salt Stains on Carpet All Winter Long
- Post-Cleaning Protection: How to Keep Carpets Cleaner Longer
- When to Call a Professional Carpet Cleaner in Lake Geneva, WI
- Conclusion
Last Updated: May 28, 2026
Wisconsin winters are brutal on carpets. Road salt tracks in with every step, leaving behind white, crystallized residue that binds to carpet fibers and causes damage that goes far deeper than it looks. If you need to remove road salt from carpets quickly and correctly, this guide from Lake Geneva Carpet Cleaning covers the exact process professionals use, including the tools, the solutions, and the mistakes most homeowners make. Below, we’ll show you exactly how to tackle salt stains at every stage, from fresh deposits to stubborn, set-in mineral deposits that have been ground into the pile.
Here’s what most guides get wrong: they treat road salt like a regular dirt stain. It isn’t. Salt is corrosive and hygroscopic, meaning it actively pulls moisture from carpet fibers and degrades them over time. The longer you wait, the worse the damage.
Why Road Salt Damages Your Carpets More Than You Think
Road salt is not a passive stain. The mineral deposits left behind by melting agents are alkaline compounds that disrupt the pH balance of carpet fibers, causing a bleached effect and gradual fiber breakdown. On synthetic carpets, this means dulling and stiffening. On natural fiber rugs, it can mean permanent structural damage.
The white residue you see is crystallized salt that has bonded to the fibers after moisture evaporated. Scrubbing it dry spreads the crystals deeper into the pile. Vacuuming alone lifts surface particles but leaves behind the mineral layer that continues to work against the fiber structure. According to The Carpet and Rug Institute’s care guidelines, abrasive contaminants like road salt are among the leading causes of premature carpet wear in cold-weather climates.
The corrosive nature of road salt also means it attracts more dirt. Salt residue acts like a magnet for grime during winter driving season, which is why high-traffic entry areas and car carpets seem to get dirty faster than anywhere else in the home.
Tools and Materials You Need Before You Start
Getting the right setup before you begin saves you from stopping mid-process and letting the stain set further. Here’s what you need:
- Stiff brush or carpet brush (for agitation)
- Spray bottle
- White vinegar (distilled)
- Dish soap (clear, not colored)
- Cold water
- Wet-dry vacuum or carpet extractor
- Clean white cloths or microfiber towels
- Dry baking soda (optional, for odor and absorption)
Avoid hot water. Heat activates the salt and drives it deeper into the carpet fibers. Cold or lukewarm water is the correct choice for every step of this process. A wet-dry vacuum is strongly preferred over a standard household vacuum for the moisture extraction phase, since it pulls liquid out rather than just moving it around.
Keep a spray bottle pre-mixed with a 50/50 vinegar and water solution near your entryway during winter months. Fast application before salt dries is the single biggest factor in how easy removal will be.
How to Remove Road Salt from Carpets: Step-by-Step
Total Time: 30-45 minutes
Difficulty: Beginner to intermediate
The most effective way to remove road salt from carpets combines dry vacuuming, a vinegar-based solution, mechanical agitation, and thorough moisture extraction. Skipping any step reduces effectiveness significantly.
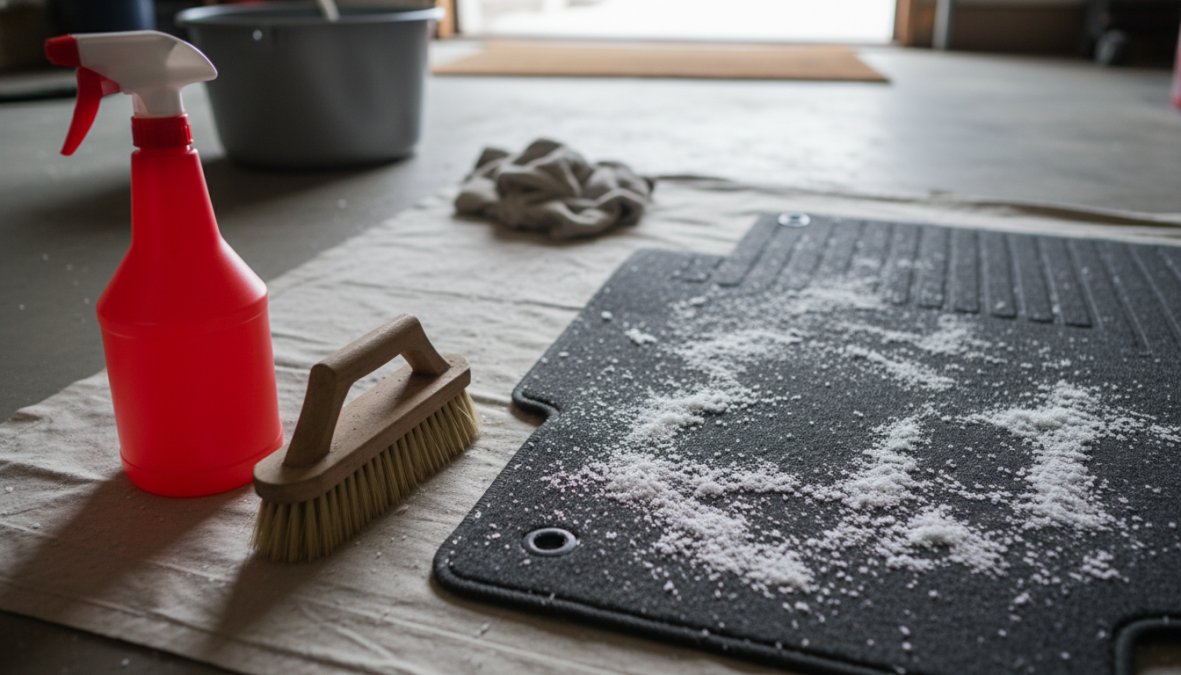
Step 1: Dry Vacuum the Affected Area First
Start dry. Before applying any liquid, vacuum the salt-stained area thoroughly to pull up loose, crystallized deposits sitting on the surface. Use a stiff brush attachment if your vacuum has one, and make multiple passes in different directions.
This step matters more than most people realize. Applying liquid to dry salt crystals that haven’t been vacuumed first dissolves them into a concentrated brine that soaks deeper into the carpet backing. Vacuuming first removes the bulk of the mineral load before any solution touches the fibers.
Step 2: Apply the Spray-Dwell-Rinse Method
Mix equal parts white vinegar and cold water in a spray bottle. Spray the affected area generously, enough to dampen the fibers without soaking through to the backing. Allow the solution to dwell for 5-10 minutes. This dwell time is critical: the acidity of the vinegar neutralizes the alkaline salt deposits and breaks the bond between the mineral deposits and the carpet fibers.
After the dwell period, blot the area with a clean white cloth, working from the outside of the stain inward. Do not rub. Rinse by spraying lightly with plain cold water, then blot again.
Step 3: Agitate the Carpet Fibers
Once the solution has dwelled and been blotted, use a stiff brush to gently agitate the carpet fibers. Work in short strokes following the direction of the pile. This mechanical action breaks up any remaining crystallized salt that the solution has loosened but not fully lifted.
A common mistake here is using too much force. Aggressive scrubbing with a stiff brush can fray carpet fibers, especially on loop-pile or berber styles. Light to moderate pressure is enough when the vinegar solution has done its job.
Step 4: Extract Moisture with a Wet-Dry Vacuum
This is the step that separates a professional result from a DIY disappointment. After agitation, use a wet-dry vacuum to extract as much moisture as possible from the treated area. Make slow, overlapping passes to pull the dissolved salt solution out of the fibers and backing.
Leaving moisture behind invites mold growth and allows any remaining salt to recrystallize as the carpet dries. If you don’t own a wet-dry vacuum, a carpet extractor rented from a hardware store works well. Standard upright vacuums cannot perform this function.
Using a Vinegar and Water Solution for Salt Stains
The vinegar and water solution for salt stains works because white vinegar is mildly acidic, typically around pH 2-3, which directly counteracts the alkaline nature of road salt. Road salt and the blended de-icing agents used on Wisconsin roads are predominantly alkaline compounds, sodium chloride, calcium chloride, and magnesium chloride all sit above pH 7 in solution. The vinegar’s acidity neutralizes that alkalinity, breaking the ionic bond between the crystallized mineral deposit and the carpet fiber surface so the residue can be lifted rather than simply smeared.
The standard ratio is 1 part distilled white vinegar to 1 part cold water. For heavier or older stains, you can increase the vinegar concentration to a 2:1 ratio (vinegar to water). Adding roughly half a teaspoon of clear dish soap per cup of solution improves the mixture’s ability to suspend salt particles in solution so the wet-dry vacuum can extract them cleanly.
Avoid colored vinegars or apple cider vinegar. The tannins in these products can leave secondary staining on light-colored carpet. Distilled white vinegar is the only reliable choice for spot treatment.
The Problem With Vinegar in Enclosed Spaces, and What to Use Instead
Vinegar is effective, but it has a real limitation that most guides ignore: in an enclosed car interior, the sharp acetic acid smell can linger for hours, especially in cold weather when windows stay closed. For homeowners treating car floor mats inside the vehicle, or for anyone with a sensitivity to strong odors, the vinegar method is genuinely uncomfortable to work with.
This is the content gap almost no competing guide addresses. Here are non-vinegar, non-toxic alternatives that neutralize road salt without the odor problem:
1. Baking Soda and Warm Water Paste
Baking soda (sodium bicarbonate) is mildly alkaline on its own, but when mixed with water and applied to a salt stain, the physical abrasion of the paste combined with moisture rehydration is often enough to loosen light-to-moderate salt deposits. Mix roughly 3 tablespoons of baking soda with enough water to form a spreadable paste. Apply to the stain, work it gently into the fibers with a soft brush, allow it to sit for 10 minutes, then vacuum thoroughly once dry. This method works best on fresher deposits and produces no detectable odor.
2. Club Soda
The carbonation in club soda creates mild effervescence that physically agitates mineral deposits at the fiber level. Pour a small amount directly onto the dampened stain, allow it to fizz for 2-3 minutes, then blot with a clean white cloth and extract with a wet-dry vacuum. Club soda is pH-neutral and leaves no residue or odor. It is less effective than vinegar on heavy or set-in salt staining but performs well for routine maintenance and light surface deposits.
3. Castile Soap and Cold Water
A few drops of liquid castile soap (a plant-based, saponified oil soap) in cold water creates a gentle surfactant solution that suspends salt particles for extraction without synthetic chemicals or strong odors. The key is using a minimal amount, too much soap leaves a residue that attracts dirt. Use no more than 5-6 drops per 16 ounces of cold water, apply, blot, and extract thoroughly.
4. Hydrogen Peroxide (3% Solution), With Caution
A 3% hydrogen peroxide solution, the standard concentration sold in drugstores, can help address the bleached or discolored appearance that road salt leaves on darker carpets. Apply sparingly to a hidden area first to confirm colorfastness, as hydrogen peroxide can lighten some carpet dyes. If the test area is stable after 10 minutes, apply to the stain, allow a 5-minute dwell, then blot and extract. This is not a primary salt remover but a useful follow-up step when salt has left visible discoloration behind.
| Solution | Odor Level | Salt Neutralization | Best For | Colorfastness Risk |
|---|---|---|---|---|
| White vinegar + water | Strong (temporary) | Excellent | Heavy or set-in stains | Low |
| Baking soda paste | None | Moderate | Light, fresh deposits | None |
| Club soda | None | Moderate | Routine maintenance | None |
| Castile soap + water | Minimal | Moderate | General cleaning | None |
| 3% hydrogen peroxide | Minimal | Low | Discoloration follow-up | Moderate, test first |
Never mix vinegar and hydrogen peroxide in the same spray bottle. Combined, they form peracetic acid, which is corrosive and can damage carpet fibers and irritate skin and airways. Use them separately, with a water rinse between applications.
For car interior cleaning specifically, the baking soda paste or club soda method is the most practical odor-free choice. Apply the treatment, extract thoroughly with a wet-dry vacuum, and leave the car doors open for 20-30 minutes to air out, even in winter. The absence of vinegar smell makes the enclosed-space problem a non-issue.
How to Remove Salt from Car Floor Mats Safely
Car floor mats take more abuse from road salt than any other surface in a vehicle. Winter driving means constant tracking of salt, slush, and melting agents across the interior, and car carpet fibers are often tighter-woven and harder to rinse than residential carpet.
The process for how to remove salt from car floor mats follows the same spray-dwell-rinse sequence, but with one important difference: remove the mats from the vehicle first. Cleaning mats in place traps moisture under the mat and against the vehicle’s floor pan, which can cause rust and mold.
Take the mats outside, shake out loose debris, and vacuum thoroughly. Apply the vinegar solution, allow it to dwell, agitate with a stiff brush, then rinse with cold water from a garden hose. Hang the mats vertically to dry completely before reinstalling. Never reinstall damp mats.
Material-Specific Safety: Rubber vs. Fabric Mats
Rubber mats and fabric mats require different handling. Rubber floor mats are the easier case: the vinegar solution is safe, agitation can be more vigorous, and rinsing with a hose is straightforward. The main concern with rubber is avoiding prolonged soaking, which can cause warping on thinner mats.
Fabric car mats are closer to residential carpet and should be treated with the same care. Avoid soaking through to the backing, use a wet-dry vacuum or extractor for moisture removal, and allow full drying time, typically 12-24 hours, before reinstalling.
Never use a steam cleaner on rubber car mats. The heat can cause warping and delamination. Stick to the cold-water vinegar method for both mat types.
Best Carpet Cleaner for Salt Stains: What Actually Works
The best carpet cleaner for salt stains is one that combines pH-neutralizing chemistry with effective moisture extraction. For DIY use, the vinegar-and-water solution outperforms most store-bought spot cleaners for road salt specifically, because most commercial products are formulated for organic stains, not mineral deposits.
If you prefer a commercial product, look for cleaners labeled as effective on mineral or hard-water stains. Enzyme-based cleaners are excellent for pet stains but offer little benefit against crystallized salt. Oxygen-based cleaners can help with the bleached effect that salt leaves behind on darker carpets.
For whole-room or whole-vehicle interior cleaning, a carpet extractor, also called a hot water extraction machine, delivers the most thorough results. These machines inject solution into the carpet pile and immediately vacuum it back out, removing dissolved minerals from deep within the fibers. This is the same technology professional carpet cleaners use.
| Cleaner Type | Best For | Effective on Salt? | Notes |
|---|---|---|---|
| White vinegar solution | Fresh and moderate stains | Yes | Best DIY option |
| Commercial spot cleaner | Organic stains | Partial | Check label for mineral stains |
| Oxygen-based cleaner | Bleached or discolored areas | Partial | Helps restore color |
| Carpet extractor (machine) | Heavy or widespread deposits | Yes | Most thorough method |
| Enzyme cleaner | Pet stains and odors | No | Not formulated for minerals |
Troubleshooting: What to Do When Salt Stains Won’t Budge
Set-in salt stains, ones that have been ground in through repeated foot traffic or left untreated for weeks, require a more aggressive approach. Here’s what to try when the standard method hasn’t worked:
- Increase vinegar concentration to a 2:1 ratio and extend dwell time to 15 minutes.
- Apply a baking soda layer after the vinegar treatment. The mild chemical reaction between the two helps lift stubborn mineral deposits.
- Use a carpet brush with stiffer bristles and apply more deliberate agitation, working in multiple directions.
- Repeat the full spray-dwell-rinse cycle two or three times rather than expecting one application to resolve everything.
- If staining persists after three cycles, the salt may have caused permanent bleaching of the fiber dye. At that point, professional assessment is warranted.
The thing nobody tells you about set-in salt stains is that the white residue you see on the surface is often just a fraction of the total mineral load. The deeper layers require multiple treatment cycles to fully dissolve and extract.
Preventing Salt Stains on Carpet All Winter Long
Prevention is a more effective strategy than treatment, and Wisconsin winters give you a long runway to get it right. Preventing salt stains on carpet during the salting season requires a layered approach at every entry point, and, critically, a post-cleaning protection step that almost no guide mentions but that professional carpet cleaners consider standard practice.
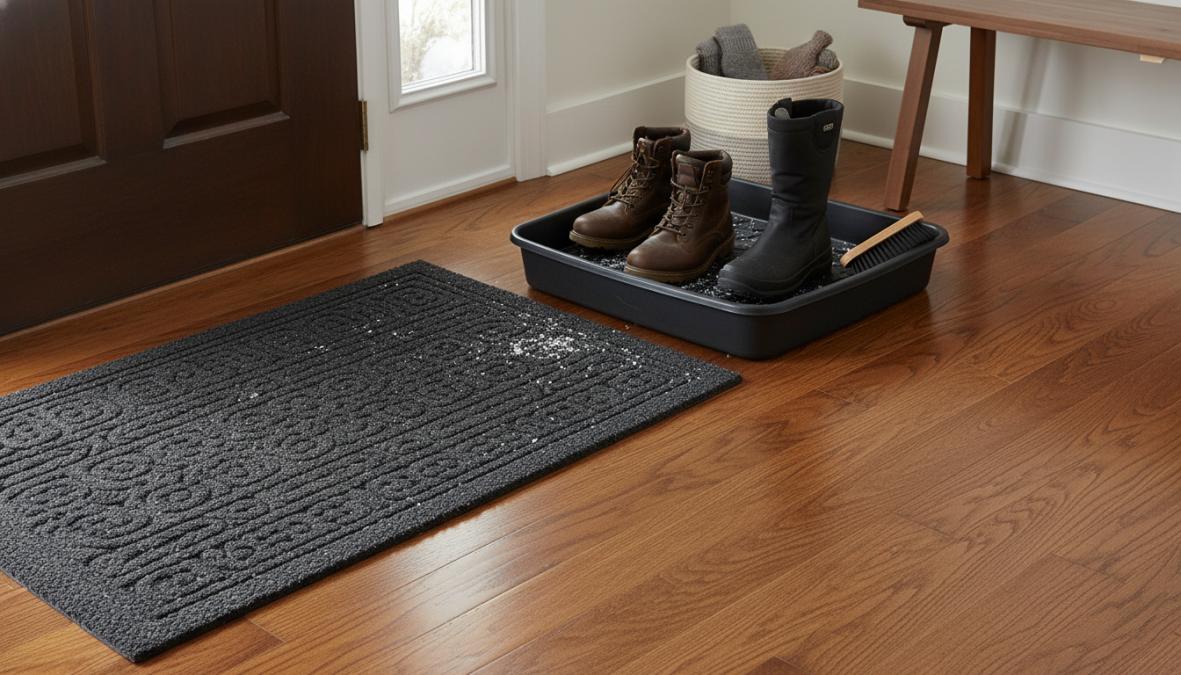
Layer 1: Control What Enters at the Door
The most effective prevention happens before salt ever touches carpet fiber.
- Dual-mat system: A coarse-bristle outdoor mat (coir or rubber-backed synthetic) captures the bulk of salt and debris before it crosses the threshold. An indoor absorbent mat, at least 18 inches deep so both feet land on it with a full stride, catches what the outdoor mat misses. A single mat, or no mat, allows a significant percentage of tracked salt to reach the carpet.
- Boot trays with raised edges: Place a rubber boot tray with at least a half-inch lip inside the entry. Salt-laden slush drains into the tray rather than soaking into the floor or adjacent carpet. Empty and rinse the tray weekly during peak winter months.
- No-shoes policy: Removing footwear at the door is the single highest-impact measure for protecting carpets. A dedicated shoe rack or cubby near the entry makes the habit easier to maintain for the whole household.
- Area rugs over carpet in high-traffic zones: A washable area rug placed over carpet in the entry zone acts as a sacrificial surface. When it becomes heavily soiled, it can be cleaned or replaced without touching the carpet underneath. Choose a rug with a non-slip, non-staining backing, some rubber backings can discolor carpet if left in place for extended periods on light-colored pile.
Layer 2: Regular Dry Vacuuming During the Season
Vacuuming high-traffic areas two to three times per week during winter prevents salt from being ground deeper into the pile with each pass of foot traffic. Salt crystals that sit on the surface are far easier to remove than salt that has been mechanically worked into the fiber structure by repeated foot pressure.
Use a vacuum with strong suction and, where possible, a beater-bar or brush-roll setting appropriate for your carpet type. On loop-pile or berber carpet, disable the beater bar to avoid snagging fibers, suction-only passes are sufficient for surface salt removal.
Layer 3: Post-Cleaning Fiber Protection (The Step Most Guides Skip)
This is the prevention step that competing guides consistently omit, and it is the one that makes the biggest difference in how easily carpets clean up the following week.
After any salt removal treatment, whether a spot clean or a full professional extraction, the carpet fibers are temporarily more vulnerable to resoiling. The cleaning process removes some of the carpet’s factory-applied soil-resistance treatment along with the salt. Without reapplication, the cleaned area will attract and hold new salt and dirt more readily than the surrounding untreated carpet.
Applying a carpet fiber protector after cleaning creates a barrier that coats individual fibers with a thin protective layer. This layer does two things: it reduces moisture penetration (slowing how quickly new salt bonds to the fiber) and it lowers the adhesion strength between contaminants and the fiber surface, making future removal faster and more complete.
Practical steps for post-cleaning protection:
- Allow complete drying first. The carpet must be fully dry before any protector is applied, at minimum 6-8 hours, longer in humid conditions. Applying protector to damp carpet traps residual moisture and can promote mold growth in the backing.
- Vacuum once dry. A thorough vacuum pass after drying restores pile direction and removes any loosened particles that surfaced during the drying process. This also gives you a clean surface for the protector to bond to.
- Apply a fluoropolymer-based fiber protector. Products in this category work by bonding to the fiber surface and creating a low-energy coating that repels both water-based and oil-based contaminants. Apply in overlapping passes according to the product’s instructions, working in sections. Allow the full cure time, typically 24 hours, before returning the area to normal foot traffic.
- Reapply after professional cleaning. Hot water extraction, while the most effective deep-cleaning method, also removes applied protectors. If you have carpets professionally cleaned at the end of winter, ask whether fiber protector reapplication is included or available as an add-on service.
The most important post-cleaning step is complete drying before foot traffic resumes. Residual moisture left in carpet fibers after salt removal is the leading cause of mold growth and accelerated resoiling during winter months. Fiber protector applied to a fully dry carpet extends the benefit of every cleaning treatment you do.
Layer 4: Seasonal Timing
Timing your cleaning and protection efforts around the Wisconsin salting calendar matters. Road salt application typically peaks during freeze-thaw cycles in January and February, with a secondary peak during late-season storms in March. Scheduling a mid-season spot treatment in early February, before the heaviest accumulation has had time to set, reduces the total mineral load your carpets carry through to spring.
According to the EPA’s indoor air quality guidance for homes, tracking in outdoor contaminants is a primary source of indoor particulate matter during winter months. Reducing what enters at the door has compounding benefits beyond carpet care alone, including air quality and overall floor longevity.
A late-winter or early-spring professional extraction cleaning, timed after the bulk of the salting season has passed but before indoor humidity rises with spring weather, is the most effective way to reset carpets before any accumulated mineral damage has a full summer to set permanently into the fiber structure.
Post-Cleaning Protection: How to Keep Carpets Cleaner Longer
Post-cleaning protection is the step most guides skip entirely. After you’ve removed road salt from carpets, the fibers are clean but temporarily more vulnerable to resoiling because the cleaning process removes some of the carpet’s natural protective coating.
Applying a carpet protector product after cleaning creates a barrier that makes future salt and dirt removal easier. These products work by coating individual carpet fibers with a protective layer that resists moisture penetration and reduces the bond strength between contaminants and the fiber surface.
A few practical post-cleaning steps worth taking:
- Allow the carpet to dry completely, at least 6-8 hours, before allowing foot traffic. Damp fibers attract dirt faster than dry ones.
- Vacuum once the carpet is fully dry to restore the pile direction and remove any loosened particles that surfaced during drying.
- Apply a fiber protector spray according to the product instructions, working in sections and allowing full cure time before use.
The most important post-cleaning step is complete drying. Residual moisture left in carpet fibers after salt removal is the leading cause of mold growth and resoiling during winter months.
When to Call a Professional Carpet Cleaner in Lake Geneva, WI
Some salt stain situations genuinely require professional intervention. If you’re dealing with large areas of salt damage, staining that has returned after multiple DIY treatments, or carpets that smell musty after cleaning, the problem has likely progressed beyond what surface treatment can address.
Professional carpet cleaning in Lake Geneva uses truck-mounted hot water extraction equipment that operates at temperatures and pressures far beyond what rental machines achieve. This technology reaches the carpet backing and subfloor padding, extracting mineral deposits and dissolved contaminants that DIY methods leave behind.
Homeowners searching for carpet cleaning near me in Lake Geneva, Wisconsin often find that professional treatment is more cost-effective than repeated DIY attempts on heavily damaged carpet. Repeated soaking without proper extraction accelerates fiber breakdown and can void carpet warranties.
The timing also matters. Late winter and early spring, after the bulk of the salting season has passed, is the ideal window for a professional deep clean. This removes the accumulated mineral load before it has a full summer to set and cause permanent fiber damage.
For residents throughout the Lake Geneva area and broader Walworth County, professional-grade extraction cleaning is the most reliable way to address a full season’s worth of road salt accumulation. As documented in the Institute of Inspection, Cleaning and Restoration Certification’s carpet care standards, hot water extraction remains the gold standard for deep removal of mineral and chemical contaminants from carpet fibers.
Schedule professional cleaning before the spring thaw fully arrives. Carpets that have absorbed a winter’s worth of salt benefit most from extraction cleaning while indoor humidity is still low, which speeds drying time significantly.
A note on material-specific considerations: wool and natural fiber carpets are more sensitive to acidic cleaning solutions than synthetic carpets. If your carpets are wool, silk, or sisal, consult a professional before applying any vinegar-based solution. The acidity that neutralizes salt effectively can also damage natural protein fibers at higher concentrations. This is one area where professional guidance pays for itself.
According to the Woolmark Company’s fiber care guidelines, wool carpets should always be cleaned with pH-neutral or near-neutral solutions to preserve fiber integrity. This is a genuine limitation of the DIY vinegar method that most how-to guides don’t address.
Winter salt damage is one of the most common and most underestimated carpet problems Wisconsin homeowners face, and DIY treatment only goes so far when mineral deposits have worked their way into the carpet backing. Lake Geneva Carpet Cleaning has spent over 32 years helping homeowners across the Lake Geneva area recover from exactly this kind of seasonal damage, using truck-mounted hot water extraction technology and eco-friendly cleaning methods that go deeper than any rental machine. With a 10-day satisfaction guarantee and meticulous attention to every job, getting a professional assessment after a hard winter is a straightforward decision. Contact Lake Geneva Carpet Cleaning and get your carpets restored before spring sets the damage permanently.
Frequently Asked Questions
Does vinegar remove salt from carpet?
Yes, white vinegar is one of the most effective DIY solutions for removing road salt from carpets. Its mild acidity helps neutralize the alkaline mineral deposits left behind by road salt, breaking down the crystallized white residue. Mix equal parts white vinegar and warm water, spray it onto the stain, let it dwell for 5-10 minutes, then blot and extract with a wet-dry vacuum. It's also an eco-friendly alternative to harsh chemical cleaners.
Will salt stains ruin my carpet permanently?
Salt stains won't always cause permanent damage, but if left untreated they can. Road salt is corrosive and, when combined with moisture, can break down carpet fibers over time, causing a bleached effect or permanent discoloration. Repeated exposure without cleaning can weaken fibers at the base. Acting quickly, ideally before the salt fully dries and crystallizes, significantly reduces the risk of lasting fiber damage and keeps your carpet looking its best through winter.
How do you get white salt stains out of car floor mats?
To remove salt from car floor mats, start by removing the mats from the vehicle and dry vacuuming loose salt crystals. Mix a vinegar and water solution (1:1 ratio) and apply it to the white residue. Let it dwell for 5 minutes, then scrub with a stiff brush to agitate the mineral deposits. Rinse with clean water and allow the mats to air dry completely before returning them to your car. For rubber mats, this method is safe; for fabric mats, avoid over-saturating.
Can I use a steam cleaner for road salt stains?
A steam cleaner or hot water extractor can be effective for removing road salt stains, especially for deep-set mineral deposits. The heat helps dissolve crystallized salt while the extraction removes moisture and residue from carpet fibers. However, it's important to pre-treat the stain with a vinegar and water solution first to neutralize the salt's pH before steaming. For heavily stained or delicate carpets, professional truck-mounted hot water extraction delivers the most thorough results.
What is the best carpet cleaner for road salt on carpet?
The best cleaner for road salt stains depends on severity. For light stains, a DIY vinegar and water solution works well and is eco-friendly. For tougher, set-in stains, a pH-balanced carpet cleaning solution paired with a wet-dry vacuum or extractor gives better results. Avoid cleaners with harsh bleaching agents, as these can worsen the bleached effect on carpet fibers. For persistent or widespread salt damage, especially after a Wisconsin winter, professional hot water extraction is the most reliable option.
This article was written using GrandRanker