
Table of Contents
- Why Preparation Matters Before Professional Carpet Cleaning
- Create a Carpet Cleaning Preparation Checklist
- Moving Furniture for Carpet Cleaning: A Step-by-Step Approach
- Pet Safety During Carpet Cleaning: Preparation and Protection
- Pre-Cleaning Tasks: Vacuuming and Spot Treatment
- How Long Does Carpet Take to Dry After Professional Cleaning
- Day-of Preparation: Final Steps Before the Technicians Arrive
- Post-Cleaning Care Instructions for Maximum Carpet Longevity
- Frequently Asked Questions
Last Updated: September 25, 2026
Why Preparation Matters Before Professional Carpet Cleaning
Learning how to prepare your home for professional carpet cleaning is one of the easiest ways to ensure the best results. When you prepare properly, technicians can focus on deep cleaning instead of moving obstacles and protecting your belongings. This means better outcomes for your carpets and a faster appointment overall.
At Lake Geneva Carpet Cleaning, we’ve seen firsthand how preparation affects the final result. Homes that are ready for our team’s arrival see noticeably cleaner carpets and faster drying times. The difference comes down to simple planning that takes just a few minutes of your time.
Think of preparation like clearing the stage before a performance. The cleaner the stage, the better the show. Your carpets deserve the same care.
Create a Carpet Cleaning Preparation Checklist
A solid checklist keeps you organized and ensures nothing gets missed. Here’s what you should tackle before the technicians arrive:
One Week Before:
- Schedule your appointment and confirm the date and time
- Check weather forecasts for the appointment day
- Identify areas with stubborn stains that need pre-treatment
- Plan where pets will stay during the cleaning
Two Days Before:
- Vacuum all carpeted areas thoroughly
- Remove small items from floors (toys, books, papers)
- Declutter surfaces near the carpet (side tables, shelves)
- Wipe down baseboards if they’re visibly dusty
One Day Before:
- Move lightweight furniture away from walls
- Treat visible stains with store-bought spot cleaners if desired
- Ensure pets have a safe space arranged for appointment day
- Confirm the appointment time with Lake Geneva Carpet Cleaning
Morning of Appointment:
- Do a final vacuum of high-traffic areas
- Move any remaining small items off the carpet
- Open windows for ventilation
- Have pets secured in another room
This checklist transforms preparation from a vague task into concrete steps. Check each item off as you complete it.
Moving Furniture for Carpet Cleaning: A Step-by-Step Approach
What to Move and What to Leave
Most furniture should be moved out of the cleaning area. This includes sofas, chairs, tables, beds, and dressers. Lightweight items like lamps and small side tables are easier to move yourself.
Heavy furniture like large entertainment centers or bedroom sets can stay in place if moving them is impractical. Just let the technicians know so they can work around these pieces. They’re trained to clean under and around stationary items.
Plant stands, shoe racks, and other floor-level items should be moved. These create obstacles and prevent thorough cleaning underneath.
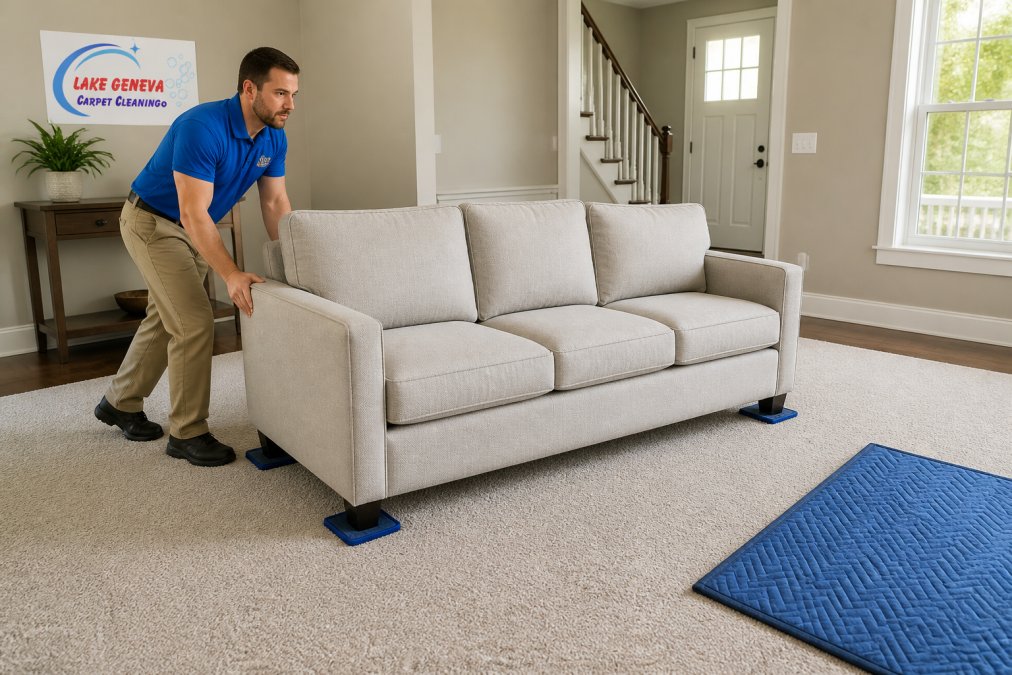
Step-by-Step Furniture Moving Checklist
Follow this process to move furniture safely and protect your home:
Step 1: Clear the Path
Before moving any piece, remove items from shelves, drawers, and surfaces. Lamps, decorative objects, and loose items should be placed on a table in an adjacent room. This prevents breakage and makes furniture lighter and easier to maneuver.
Step 2: Protect Furniture Legs and Carpet
Place furniture sliders (plastic or felt pads) under all four legs of each piece before moving. If you don’t have sliders, use flattened cardboard boxes or folded towels under each leg. These barriers prevent dragging, which can create permanent marks or pull carpet fibers. For especially heavy pieces, slide a sheet of plywood under the furniture to distribute weight evenly as you move it.
Step 3: Lift and Move Carefully
When possible, lift furniture slightly as you push it rather than dragging. Enlist help from a family member or friend, moving furniture alone increases the risk of damage to both the carpet and your back. Move furniture in a straight line toward the exit rather than at angles, which can catch carpet edges.
Step 4: Protect Baseboards and Trim
Place blankets, towels, or cardboard along baseboards in the path of furniture movement. Baseboards and door trim can be scuffed or dented by furniture corners. This simple step prevents cosmetic damage that would require repair after cleaning.
Step 5: Document the Layout
Before moving the first piece, take a photo of the room from multiple angles. This visual record helps you remember exactly where each item belongs when you’re putting everything back. Label furniture with small sticky notes if you have multiple rooms being cleaned.
Step 6: Move to Adjacent Spaces
Push furniture into hallways, bedrooms, dining areas, or other rooms away from the main cleaning zone. Cluster similar items together (all living room furniture in one room, all bedroom furniture in another) to make reassembly faster and easier.
Handling Fragile Decor and Accessories
Small decorative items, framed photos, throw pillows, and blankets should be removed from furniture and stored safely before the technicians arrive. Place these items in boxes and store them in a closet or bedroom away from the cleaning area. This protects them from moisture and prevents them from being in the way.
For items that must stay in the room (such as wall-mounted shelving or artwork), ensure they are secure and won’t be affected by moisture or air movement from cleaning equipment.
After Furniture Is Moved
Once all furniture is relocated, do a final walkthrough of the cleaned area. Look for any small items you may have missed, coins, toys, papers, or pet items. The cleaner the floor, the more thorough the professional cleaning will be. Point out any remaining obstacles or concerns to the technician when they arrive.
Pet Safety During Carpet Cleaning: Preparation and Protection
Pets need a safe space away from the cleaning process. This protects them from noise, equipment, and cleaning solutions.
Create a pet-safe zone at least 24 hours before. Choose a room away from the main cleaning area. Stock it with water, food, litter box (for cats), and comfortable bedding. Let your pet spend time in this space before appointment day so they’re comfortable there.
Keep pets in the safe zone during cleaning. Close doors to prevent them from wandering into active cleaning areas. The noise and activity can stress pets, and they might interfere with the technician’s work.
Ensure proper ventilation in the pet area. Open a window or use a fan to keep air fresh. Pets shouldn’t breathe in cleaning solution fumes.
Have fresh water available. Pets may drink more when stressed. Keep their water bowl full throughout the appointment.
Plan for bathroom breaks. If your pet needs to go outside during cleaning, arrange for someone to take them out. Don’t let them cross freshly cleaned carpets.
For pets with anxiety, consider asking your veterinarian about calming options before the appointment. A calm pet is safer and happier during the process.
Pre-Cleaning Tasks: Vacuuming and Spot Treatment
Vacuuming before professional cleaning removes surface dirt and prepares carpet fibers. This simple step makes a real difference in results.
Vacuum thoroughly two days before. Use slow, overlapping passes to pull dirt from deep in the carpet. Go over high-traffic areas multiple times. Don’t rush this step, it removes debris that can interfere with professional cleaning.
Vacuum again the morning of. A quick pass over main areas removes dust and pet hair that accumulated overnight. Focus on hallways and living spaces.
Spot treat visible stains if desired. Apply store-bought spot cleaners to stains according to product directions. Let them sit for the recommended time. Don’t oversaturate, too much liquid can damage carpet backing.
Test spot cleaners first. Always test any product on a hidden area of carpet before applying to visible stains. Some products can bleach or discolor certain carpet types.
Don’t over-treat. Leave heavy stain work to the professionals. Over-treating with multiple products can create residue that interferes with professional cleaning.
Understanding how to prepare your home for professional carpet cleaning sets the stage for professional results. Lake Geneva Carpet Cleaning’s team can then focus on deep extraction rather than surface cleaning.
How Long Does Carpet Take to Dry After Professional Cleaning
Drying time depends on humidity, ventilation, and the cleaning method used. Most carpets dry within 24 hours, though some dry faster.
Factors that affect drying time:
- Humidity level in your home
- Air circulation and ventilation
- Carpet thickness and density
- Amount of moisture used during cleaning
- Temperature in your home
Speed up drying with these steps:
- Open windows to increase air flow
- Run ceiling fans throughout the home
- Turn on air conditioning to lower humidity
- Keep interior doors open so air circulates
- Avoid walking on wet carpet when possible
Expect foot traffic after 4-6 hours. Most carpets are dry enough for light walking within this timeframe. Avoid heavy furniture movement for at least 24 hours.
Professional equipment removes more water. Truck-mounted hot water extraction systems used by Lake Geneva Carpet Cleaning pull out more moisture than rental machines. This means faster drying and better results.
Don’t resoil wet carpet. Keep traffic to a minimum while carpet is damp. Dirt sticks to wet fibers more easily than dry ones.
Day-of Preparation: Final Steps Before the Technicians Arrive
The morning of your appointment is when final touches happen. These last-minute steps ensure everything runs smoothly.
Do a quick walkthrough. Check each room for items left on the floor. Remove throw pillows from furniture if it’s staying in place. Clear off nightstands and shelves near carpet.
Lock up valuables. Put jewelry, documents, and other valuables in a secure location. This gives you peace of mind during the appointment.
Let the technicians know about problem areas. Show them stains you want special attention on. Point out traffic lanes and heavily soiled spots. This helps them prioritize their work.
Provide clear access. Make sure the front door and hallways are clear for equipment entry. Technicians need space to move hoses and machinery.
Confirm water and electricity access. Professional cleaning equipment needs water and power. Point out where the nearest outlets and water sources are located.
Stay home or arrange access. Be present for the appointment or leave a key with a trusted neighbor. The technicians need someone to answer questions and let them finish the work.
Ask about walk-on time. Confirm when it’s safe to walk on the carpet. Most professionals recommend waiting 4-6 hours, but ask to be sure.
Post-Cleaning Care Instructions for Maximum Carpet Longevity
What you do after cleaning matters just as much as preparation. Proper care extends carpet life, prevents resoiling, and ensures the investment in professional cleaning delivers lasting results.
Understanding Carpet Drying After Professional Cleaning
Professional carpet cleaning uses hot water extraction, which removes deep dirt and allergens but leaves moisture in the carpet. Drying time depends on several factors:
Humidity and Temperature: Low humidity and warm temperatures speed drying. If your appointment falls on a humid or cool day, drying may take longer. Conversely, a warm, dry day can cut drying time significantly.
Air Circulation: Stagnant air prolongs drying. Homes with good ventilation and air movement dry faster than those with closed windows and still air.
Carpet Type and Density: Thick, dense carpets hold more moisture than thin, low-pile varieties. Wool carpets may dry differently than synthetic blends. The technician can advise on your specific carpet’s expected drying timeline.
Extraction Method: Professional truck-mounted extraction systems pull out significantly more moisture than rental machines or portable equipment. This means faster drying and better results, typically 4 to 24 hours depending on conditions.
The First 4-6 Hours: Critical Drying Period
Immediately after the technicians leave, your carpet is at its wettest. During this window:
Minimize foot traffic. Avoid walking on the carpet if possible. If you must walk on it, wear clean socks or go barefoot. Shoes track dirt onto wet fibers, and dirt sticks to damp carpet far more readily than dry carpet, undoing the cleaning work.
Keep children and pets off cleaned areas. Young children and pets are more likely to soil wet carpet. Confine them to uncleaned rooms or areas with hard flooring until carpet is dry.
Don’t place furniture back yet. Wet carpet cannot support furniture weight safely. Furniture legs can sink into damp fibers, creating permanent indentations. Wait at least 24 hours before moving furniture back into place.
Don’t place wet items on carpet. Keep potted plants, wet towels, damp clothing, and water glasses off the carpet. Moisture transfer can cause new stains or mildew growth.
Hours 6-24: Active Drying Phase
During this period, your carpet is still damp but becoming progressively drier. Continue these practices:
Keep windows open. Fresh air is one of the most effective drying tools. Open as many windows as weather permits, even if it’s cool outside. Air exchange removes moisture from the home and speeds evaporation.
Run ceiling fans and portable fans. Fans create air movement across carpet fibers, accelerating drying. Point fans toward wet areas and run them continuously. Cross-ventilation (opening windows on opposite sides of the home) combined with fans is highly effective.
Use air conditioning. Air conditioning lowers humidity, which is critical for drying. Set your thermostat to a comfortable temperature and let the system run. Lower indoor humidity means faster evaporation from carpet fibers.
Keep interior doors open. Open doors between rooms to allow air to circulate throughout the home. Closed doors trap moisture in individual rooms and slow drying.
Avoid using heat sources. Do not use space heaters or fireplaces during the drying period. Uneven heat can cause carpet to dry unevenly, potentially creating wrinkles or buckling.
After 24 Hours: Return to Normal Use
Most carpets are dry enough for normal use after 24 hours, though some may still feel slightly damp to the touch.
Wait before vacuuming. Do not vacuum until carpet is completely dry, typically 24-48 hours after cleaning. Wet carpet fibers can be damaged by vacuum beaters. Vacuuming wet carpet can also spread moisture deeper into the carpet backing, potentially causing mildew.
Move furniture back carefully. Once carpet is dry, return furniture to its original position. Use the photos you took before cleaning as a reference. Move furniture slowly to avoid creating new marks or damaging dry fibers.
Resume normal cleaning routines. After 48 hours, you can resume regular vacuuming, mopping hard floors, and normal household activities.
Preventing Resoiling and Extending Carpet Life
Blot spills immediately. If accidents happen after cleaning, blot with a white cloth or paper towel. Do not rub, as rubbing pushes liquid deeper into fibers and can spread the stain. Blotting removes the liquid without damaging fibers.
Avoid walking in shoes on cleaned carpet for the first 24 hours. Shoes track dirt, oils, and outdoor debris onto freshly cleaned fibers. Go barefoot or wear clean socks for at least one day after cleaning.
Vacuum weekly between professional cleanings. Regular vacuuming removes surface dirt before it settles deep in carpet fibers. Weekly vacuuming extends the time between professional cleanings and keeps carpet looking newer longer.
Address stains promptly. Small spills cleaned immediately are far easier to remove than set-in stains. Keep a white cloth and spray bottle of water nearby for quick cleanup.
Schedule regular professional maintenance. Professional cleaning every 12-18 months removes buildup that causes wear, dullness, and odors. Regular cleaning is more effective and less expensive than waiting until carpet is heavily soiled. When you’re ready to schedule your next appointment, contact us for a free quote.
Frequently Asked Questions
Do I need to vacuum before professional carpet cleaning?
Yes, vacuuming before your appointment removes loose surface dirt and debris, allowing the professional equipment to focus on deep cleaning embedded soil and allergens. Spend 10-15 minutes vacuuming high-traffic areas and the entire carpeted space. This step helps the hot water extraction process work more effectively and ensures your carpet receives the thorough cleaning you’re paying for.
Should I move furniture before the carpet cleaners arrive?
Moving lightweight furniture ahead of time speeds up the cleaning process and ensures technicians can access all carpet areas. Heavy pieces like sofas and beds can often be moved by the professional team, but confirm this when you schedule. If you move items yourself, use furniture sliders to protect your floors and prevent injury. Clear at least a 2-3 foot perimeter around the room to give technicians space to work.
What should I do with my pets during carpet cleaning?
Keep pets in a separate, pet-safe room away from the cleaning area. This protects them from exposure to cleaning solutions and equipment noise, and prevents them from walking on wet carpets. Ensure they have access to water and a comfortable space. If your pet has separation anxiety, consider boarding them or having a family member supervise in another area of the home during the service.
How long does carpet take to dry after professional cleaning?
Drying time typically ranges from 4 to 24 hours, depending on humidity, air circulation, carpet type, and the cleaning method used. Truck-mounted hot water extraction systems remove more moisture than portable units, often reducing drying time. Keep the area well-ventilated by opening windows and running fans. Avoid walking on wet carpets and keep furniture off the carpet until it’s completely dry to prevent mold and mildew growth.